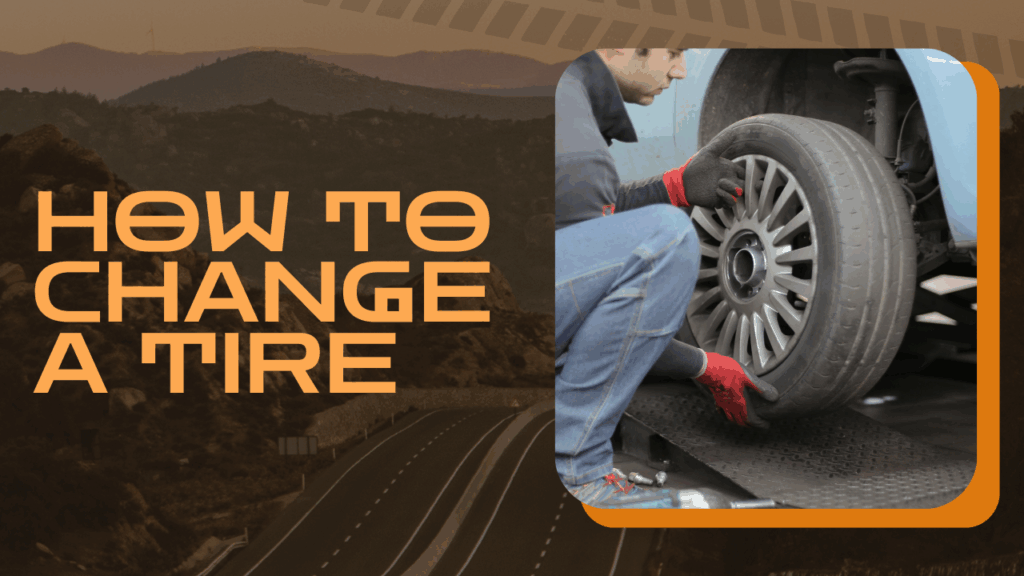
Changing a tire is a practical skill everyone should have. Learning how to change a tire step by step involves securing the vehicle, loosening the lug nuts, lifting the car with a jack, removing the flat tire, placing the spare tire on, tightening the lug nuts, and lowering the vehicle.
I’ve found that understanding this process helps reduce stress during unexpected flats. Knowing the right steps and tools to use can save time and keep you safe on the road.
Once you get comfortable with these simple actions, changing a tire becomes a straightforward task rather than a frustrating challenge.
Changing a flat tire might seem intimidating, but mastering the steps to change a tire is an essential skill for every driver. Whether you are stuck on a highway or performing a change tire at home routine, safety is your first priority. Ensure the vehicle is on level ground, engage the parking brake, and use a heavy object to block the wheels.
To begin, you need to take out a tire from its storage compartment—usually the trunk—along with your car jack and lug wrench. Before lifting the vehicle, use the wrench to loosen the lug nuts; this makes it much easier to remove a tire once it’s off the ground. After loosening, position the car jack tire change equipment under the vehicle’s reinforced frame. Pump the jack until the flat tire is clearly off the ground.
Key Steps for a Smooth Change
- Unscrew the Nuts: Completely remove the loosened lug nuts by hand.
- Remove the Flat: Pull the flat tire toward you until it slides off the wheel hub.
- Mount the Spare: Align the spare tire with the wheel bolts and push it into place.
- Hand Tighten: Put the lug nuts back on and tighten them by hand in a star pattern.
Once the spare is on, lower the car until the tire touches the ground, then use the wrench to fully tighten the nuts. Knowing how to change a flat tire (or how to change a flat tyre, depending on where you live) ensures you aren’t left stranded. Remember, most spare tires are temporary “donuts” and aren’t designed for high speeds or long distances. After you how to change tire on car successfully, head straight to a mechanic to get your original tire repaired or replaced.
Essential Tools and Equipment
Having the right tools and knowing the condition of your tire are crucial before starting. Safety equipment also plays a key role in protecting yourself during the tire change process.
Required Items for Changing a Tire
I always make sure to have a spare tire, lug wrench, and car jack ready in my vehicle. The spare must be fully inflated and suitable for the vehicle.
A lug wrench is needed to loosen and tighten the lug nuts. It usually has a cross shape or an L-shape for leverage. The car jack is essential for lifting the vehicle off the ground safely.
Sometimes, I carry wheel wedges to prevent the car from rolling, and a flashlight for visibility if it gets dark. Having gloves on hand also helps protect my hands.
How to Check Tire Condition
Before changing a tire, I inspect the spare and the one being replaced. Tires should have adequate tread depth—at least 2/32 of an inch. I look for cracks, bulges, or any visible damage on the sidewalls.
It’s important to check the air pressure using a gauge. Undinflated tires cause handling problems and wear out faster.
If I notice any excessive wear or damage that might compromise safety, I replace the tire immediately instead of risking it on the road.
Learning how to loosen lug nuts is often the most physically demanding part of changing a tire, but using the right technique makes it much easier. Before you even think about lifting the car with a jack, you must address the loosening tire lug nuts process while the vehicle’s weight is still on the ground. This prevents the wheel from spinning aimlessly while you apply force.
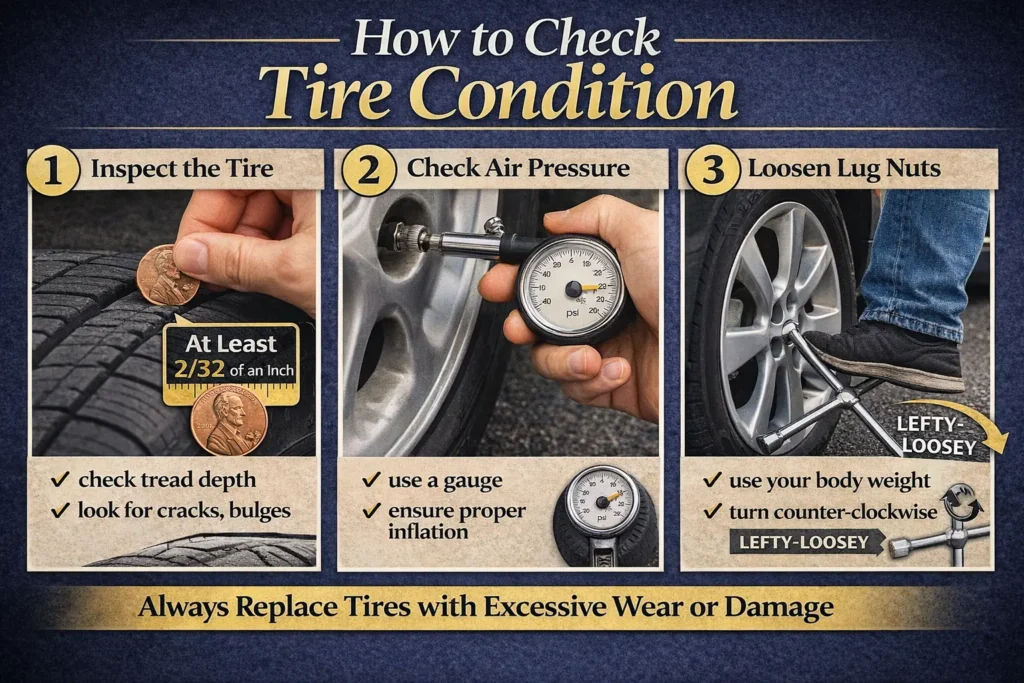
To start, place your lug wrench (or breaker bar) onto one of the tire bolts. To loosen wheel nuts effectively, remember the golden rule: “lefty-loosey.” You need to turn the wrench counter-clockwise. If the nuts are rusted or over-tightened, don’t rely on arm strength alone; use your body weight by stepping on the wrench handle to break the initial resistance.
Quick Tips to Remove Lug Nuts
- The Star Pattern: Always work in a crisscross or star pattern rather than going in a circle to ensure even pressure.
- Avoid Full Removal: At this stage, you are only “breaking” the tension. Do not how to remove lug nuts completely until the car is safely jacked up.
- Leverage is Key: If you’re struggling with how to loosen tire bolts, a longer wrench or a hollow pipe slipped over the handle provides the extra leverage needed to move stubborn hardware.
Recommended Safety Gear
I wear reflective clothing or a safety vest when changing a tire on the roadside. This makes me visible to other drivers, especially at night or in low-light conditions.
Using work gloves protects my hands from sharp objects, dirt, and grease. Closed-toe shoes are a must to avoid injuries from falling tools or the tire itself.
I usually place warning triangles or cones several feet behind the vehicle to alert oncoming traffic. These simple measures reduce the risk of accidents significantly.
Preparation Before You Start
Before changing a tire, I focus on securing my environment and getting everything ready. This means ensuring my car is stable, visible, and accessible for the tire change process. Each step helps prevent accidents and makes the job easier.
Find a Safe Location
I always watch for a flat, solid surface away from traffic. A quiet roadside shoulder, parking lot, or wide driveway works best. Avoid soft ground or steep slopes that might cause instability during the change.
If possible, I move the car off the road completely. I avoid curves or narrow shoulders, where visibility to other drivers is limited. Choosing a place with good lighting also helps if I need to work in dim conditions.
Engage Parking Brake and Hazard Lights
To keep my car from moving, I always engage the parking brake immediately. This reduces risk of the vehicle rolling while I’m under or near it. If the car is manual, putting it in first gear or reverse adds extra safety.
Next, I turn on my hazard lights. This alerts other drivers that I’m stopped and performing roadside work. It is especially critical on busy roads or highways, increasing visibility and reducing accident risks.
Remove Wheel Covers or Hubcaps
Before lifting the car with a jack, I remove the wheel covers or hubcaps. I use a flathead screwdriver or the flat end of the lug wrench to pry them off gently. It’s easier to do this now rather than after loosening the lug nuts.
Some covers may be secured by clips or screws, so I check carefully to avoid damaging them. Removing these first ensures I can access the lug nuts without obstruction during the actual tire change.
Loosening the Lug Nuts
Before you remove the tire, you need to loosen the lug nuts that secure it. This requires the right placement of the lug wrench and proper technique to avoid damage or injury.
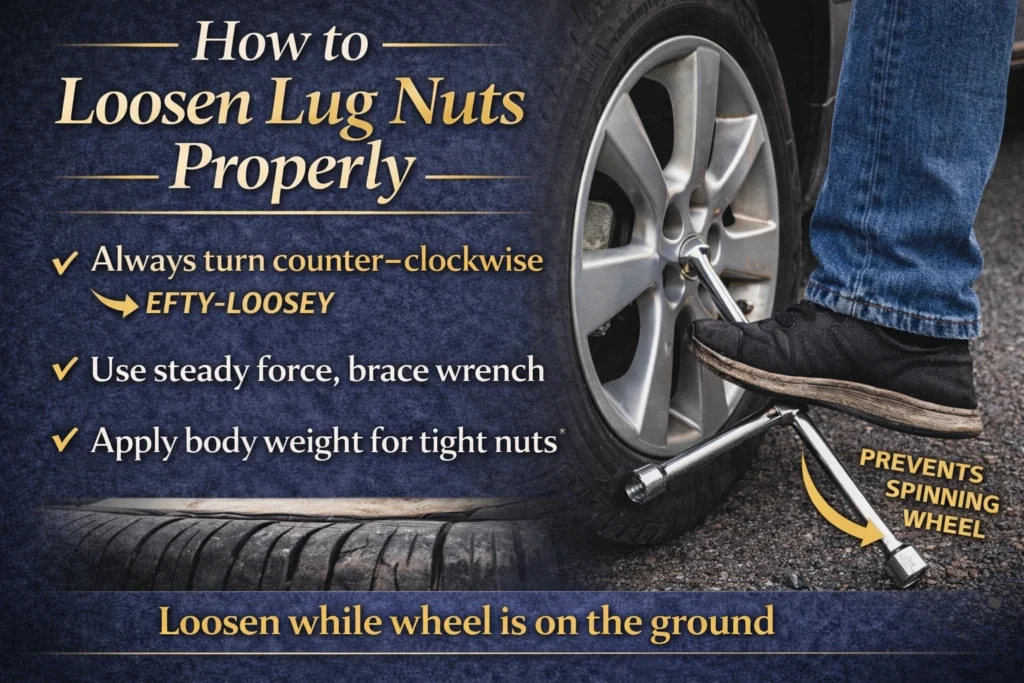
Correct Lug Wrench Placement
I position the lug wrench so the socket fits squarely over the lug nut. This ensures even pressure and reduces the chance of stripping the nut.
I make sure the wrench is fully seated before applying force. If the fit is loose, the wrench can slip, damaging the lug nut’s edges. Using a cross or socket wrench designed for your car’s lug nuts is best.
If possible, I use a wrench with a longer handle to increase leverage. This makes loosening tight lug nuts easier and safer.
Turning Lug Nuts Properly
I always turn the lug nuts counterclockwise to loosen them. That means pushing or pulling the wrench in that direction—depending on your position and the wrench handle.
I apply steady force rather than quick jerks to avoid slipping. If a nut is very tight, I brace the wrench firmly and use my body weight to assist.
It’s important to loosen lug nuts while the wheel is still on the ground slightly. This prevents the wheel from spinning as you turn the nuts.
When it comes to vehicle maintenance, having the right lug wrench in your trunk can be the difference between a quick fix and a long wait for a tow truck. The most common tool found in basic emergency kits is the L-shaped lug nut wrench, which provides decent leverage but can be hard on the hands. However, many DIY enthusiasts prefer the 4 way lug wrench, also known as a cross lug wrench, because of its versatility. This X-shaped tool features four different socket sizes, ensuring you have the correct fit for various lug nut wrenches regardless of the vehicle’s make or model.
Using a tire wrench correctly is all about leverage and grip. The design of a tire nut wrench allows you to use both hands to apply even torque, which reduces the risk of stripping the bolts or slipping. Whether you call it a lug nut wrench or a tire wrench, the key is to ensure the socket fits snugly over the nut before applying pressure. Investing in a high-quality set of lug nut wrenches ensures that you are prepared for any roadside emergency, making the process of removing stubborn nuts much safer and faster.
Lifting the Vehicle Safely
Lifting the car requires precision and caution. I focus on getting the jack positioned firmly and raising the vehicle just enough for the tire change.
Position the Jack Correctly
I begin by locating the designated jack points on the vehicle, which are usually marked in the owner’s manual or visible near the wheel wells. Placing the jack outside these spots risks damage or instability.
Once identified, I set the jack flat on solid ground to prevent slipping. Uneven or soft surfaces like gravel or grass can make the jack unstable, so I look for the firmest, flattest spot. Then, I align the jack saddle directly under the correct lifting point, ensuring it makes full contact.
I double-check that the jack is vertical and steady. This positioning decreases the chance of the vehicle shifting or the jack tipping when I begin to raise it.
Raise the Vehicle Height
I start pumping the jack handle slowly and steadily. It’s crucial to lift the car just enough so that the flat tire is off the ground by several inches to provide enough clearance for removal and replacement.
Lifting too high can be unsafe and unstable, so I watch carefully as the vehicle rises. When I see enough clearance, I stop and ensure the car remains balanced. A quick shake or gentle push confirms the stability before I continue working on the tire.
If the vehicle feels insecure or the jack shifts, I lower it and reposition the jack before trying again. My safety depends on steady support during this entire process.
Removing and Replacing the Tire
I start by loosening the tire’s lug nuts before fully removing the flat tire. Then, I carefully mount the spare tire, ensuring everything is secure and ready for safe driving.
Take Off the Flat Tire
First, I make sure the car is on a flat surface and the parking brake is engaged for safety. Using the lug wrench, I loosen the lug nuts by turning counterclockwise. I don’t remove them completely yet—just loosen them enough to turn by hand later.
Next, I position the jack under the vehicle’s recommended jacking point, usually near the flat tire. I lift the car until the tire is off the ground. At this stage, I finish removing the lug nuts and keep them in a safe place.
Finally, I pull the flat tire straight off the wheel hub. I place it aside carefully to avoid tripping or damaging it.
Mount the Spare Tire
I align the spare tire’s holes with the wheel studs before pushing it onto the hub. The fit should be snug; if not, I adjust the angle slightly.
After placing the spare, I hand-tighten the lug nuts in a star pattern to hold the tire evenly. This prevents misalignment or warping.
Once the lug nuts are hand-tight, I lower the car back to the ground. I then use the lug wrench to fully tighten the nuts, again in a star pattern. I apply firm pressure to ensure the nuts are secure but avoid over-tightening which can damage threads.
Securing and Lowering the Vehicle
After placing the spare tire and starting to secure it, I need to focus on properly tightening the lug nuts and safely lowering the vehicle. These steps ensure the tire is securely attached and the car is stable before driving.
Tighten Lug Nuts in the Correct Sequence
I begin tightening the lug nuts using a star or crisscross pattern. This method evenly distributes pressure across the wheel, preventing warping or misalignment. If the wheel has five lug nuts, I tighten them in a sequence like 1-3-5-2-4.
I start by hand-tightening each nut to avoid cross-threading. Once all nuts are snug, I use a wrench to tighten them further. I apply firm, consistent pressure but avoid over-tightening until the vehicle is lowered.
Lower the Jack Safely
Before fully lowering the jack, I double-check that all lug nuts are at least hand-tightened. I then slowly lower the jack, keeping a controlled pace to avoid sudden drops.
Once the vehicle is fully on the ground, I use the wrench to tighten the lug nuts fully. This final tightening secures the tire against the hub and is crucial for safe driving. I make sure each lug nut is tight by checking again with the wrench in the star pattern.
Knowing how to replace a tire on a rim is a more advanced task than a simple roadside change, as it involves separating the rubber from the metal wheel. The process of how to remove a tire from a rim begins with completely deflating the tire by removing the valve core. Once the air is out, the most challenging part is breaking the “bead”—the tight seal where the tire meets the edge of the rim.
If you are attempting to how to change tire on rim at home, you will need specialized tools like tire irons or a manual tire changer to pry the bead over the lip. When learning how to change tires on rims, it is crucial to lubricate the edges with soapy water to prevent damaging the rubber. Whether you need to how to replace tire on rim due to a puncture or simply to how to change a tire rim for an upgrade, remember that balancing the new assembly is vital. Without professional balancing equipment, a DIY swap can lead to dangerous vibrations at high speeds.
Final Steps and Safety Checks
After putting the spare tire on, I focus on securing everything properly and making sure the vehicle is safe to drive. Checking the lug nuts, storing tools and the flat tire, and verifying tire pressure are essential before hitting the road.
Double-Check Lug Nuts
I always go over the lug nuts twice. First, I tighten them by hand as much as I can while the car is still on the jack. After lowering the car completely, I use the wrench to tighten the nuts in a star pattern. This ensures even pressure on the wheel.
Using the star pattern means tightening one nut, then moving diagonally across to the opposite nut. I repeat this process until each lug nut feels firmly tightened. Loose lug nuts can cause wobbling or even the wheel coming off, so this step is vital for safety.
Stow Tools and Damaged Tire
Once the wheel is secure, I gather all the tools: lug wrench, jack, and any extension bars. I place them back in their storage compartments or trunk spots so they don’t shift while driving.
I also carefully put the damaged tire in the trunk or back of the vehicle. Securing the flat tire prevents it from rolling or sliding around, which could be distracting or dangerous during the drive.
Check Tire Pressure
Before I drive off, I use a tire pressure gauge to check the spare’s pressure. Spare tires, especially “donut” types, usually require a higher PSI than normal tires — often around 60 PSI.
If the spare isn’t inflated enough, I pump it up at the nearest service station. Proper tire pressure helps maintain handling and prevents premature wear. Driving with the wrong pressure can cause further issues and reduce safety.
Tips for Preventing Future Flat Tires
Preventing flat tires requires active care and awareness while driving. I focus on maintaining my tires regularly and recognizing potential hazards on the road before they cause damage.
Regular Tire Maintenance
I check my tire pressure at least once a month and before long trips. Underinflated or overinflated tires wear unevenly and increase the risk of flats. I use a reliable tire gauge to get accurate readings.
Rotating tires every 5,000 to 7,000 miles helps distribute wear evenly. I also inspect the tires for cracks, bulges, or embedded objects like nails. Replacing tires worn below the tread depth of 2/32 inch is essential for safety.
Keeping my wheels aligned and balanced reduces vibration and minimizes tire damage over time. I make sure my spare tire is in good condition and properly inflated too.
Identifying Road Hazards
I stay alert for common causes of flat tires such as potholes, debris, and sharp objects. Avoiding these hazards or slowing down over rough surfaces helps protect my tires.
When driving in construction zones or areas with loose gravel, I maintain a steady speed to reduce tire impact. Regularly scanning the road ahead lets me spot and steer clear of broken glass, metal shards, and other hazards.
If I suspect damage after hitting debris or potholes, I pull over safely to inspect my tires. Catching problems early prevents flats or blowouts later.
When to Call for Professional Assistance
Knowing when changing a tire yourself is unsafe or when your spare won’t do the job is crucial. These situations require professional help to avoid further damage or danger.
Identifying Unsafe Conditions
If I’m on a busy highway or in poor weather, changing a tire myself can be very risky. Standing close to fast-moving traffic increases the chance of accidents.
Also, if the ground is uneven, soft, or icy, the jack may slip, making the process dangerous. Nighttime or low visibility conditions add to the hazards.
If I feel unsure about my safety or the stability of my surroundings, I call roadside assistance. It’s better to wait for help than risk an injury or worsen the situation.
Knowing exactly where to put jack when changing tire is the most critical safety step in the entire process. If you place the jack in the wrong spot, you risk damaging the vehicle’s floorboards or, worse, having the car slip off. Every vehicle has specific jacking points—usually reinforced metal ribs or notches—located along the side of the car, just behind the front wheels or in front of the rear wheels.
To ensure a secure lift, consult your owner’s manual to identify the exact jack placement for your specific model. When you are determining where to put jack when changing tire, look for the thickest part of the frame or a designated “pinch weld” designed to support the car’s weight.
Avoid placing the jack under plastic body panels, fuel lines, or suspension parts, as these can bend or break. Once the jack is correctly aligned, raise the vehicle slowly, keeping an eye on the stability of the car jack tire change setup. Using the correct jacking location ensures your safety and prevents costly structural damage to your car.
How to Change a Tire: Understanding the Limitations of Spare Tires
Not all spare tires are meant for long-term use. Most are compact and designed only to get me to the nearest repair shop.
They usually have speed limits, often below 50 mph, and limited mileage, generally under 70 miles. Driving beyond these limits risks damage to the spare and the vehicle.
If my spare is missing, damaged, or flat itself, I can’t rely on it. In those cases, professional towing or repair is necessary. I check my spare regularly to avoid surprises.